
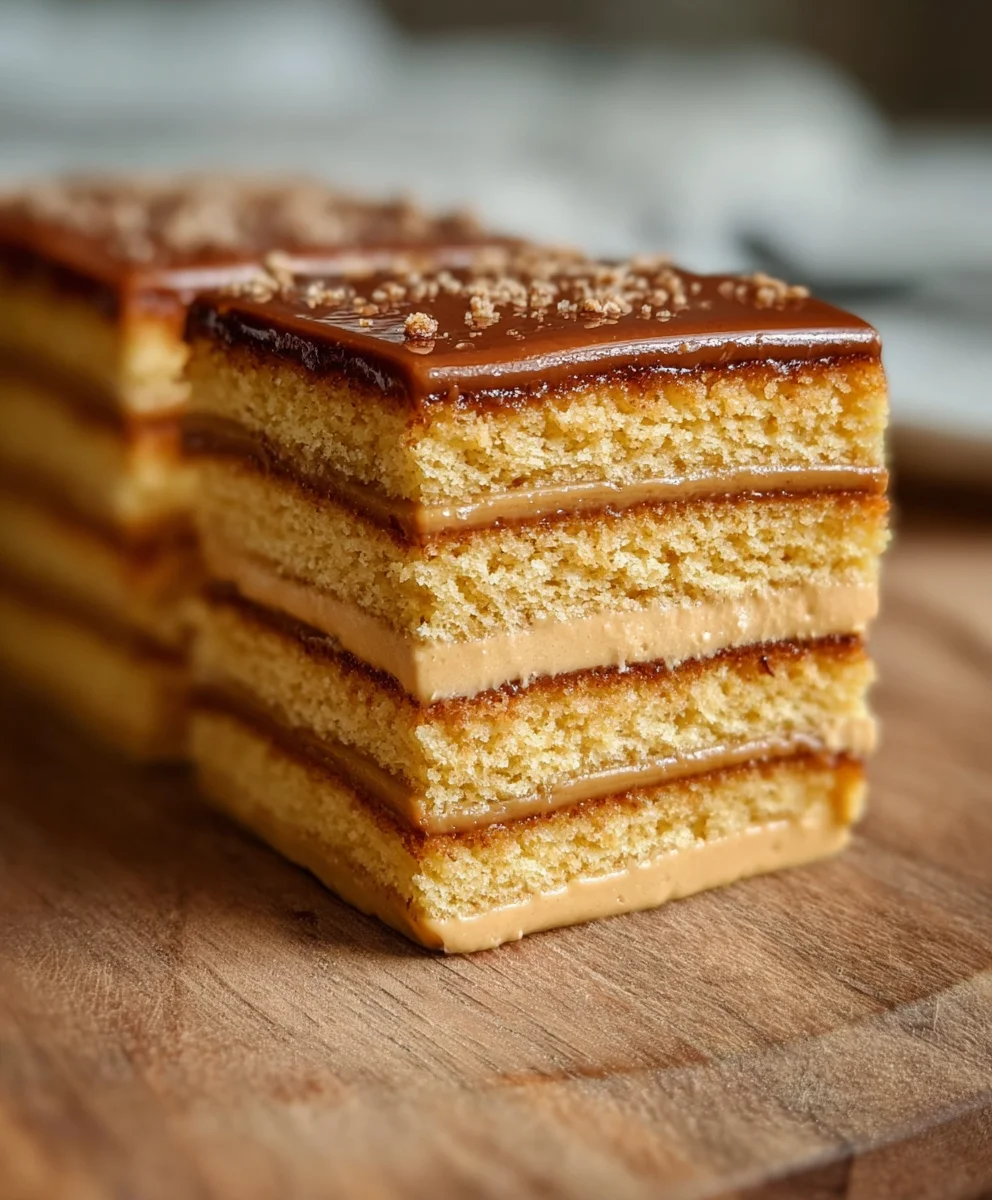
Gâteau Petit Beurre au Café : Une douceur rétro irrésistible truly captures the essence of nostalgic comfort food with a sophisticated twist. This isn’t just any cake; it’s a delightful journey back in time, evoking memories of simpler days while tantalizing your taste buds with its rich, coffee-infused flavors. We absolutely adore this dessert because it strikes a perfect balance between humble begin extractnings and elegant execution. The star of the show, the iconic Petit Beurre biscuit, is transformed from a simple snack into the foundation of a layered masterpiece. What makes this Gâteau Petit Beurre au Café so special is its unique texture – a delightful contrast between the slightly softened, coffee-soaked biscuits and the smooth, creamy filling. It’s a dessert that’s both wonderfully easy to assemble and impressively decadent, making it a guaranteed hit at any gathering or a perfect solo indulgence. Get ready to fall in love with this charming French classic.
Ingredients:
- 150 grams unsalted butter, softened
- 100 grams granulated sugar
- 2 large eggs
- 200 grams all-purpose flour
- 50 grams cocoa powder
- 1 teaspoon baking powder
- 1/2 teaspoon salt
- 200 ml milk
- 1 teaspoon vanilla extract
- 100 grams dark chocolate, chopped
- 100 ml strong brewed coffee, cooled
- 1 tablespoon instant coffee granules
- 200 ml heavy cream
- 50 grams powdered sugar
- 1 teaspoon coffee liqueur extract (optional)
- Petit Beurre biscuits (enough to form layers, approximately 30-40 biscuits)
Preparing the Coffee Syrup
Step 1: Infuse the Coffee Flavor
First, let’s get our coffee syrup ready. This will be responsible for infusing our Petit Beurre biscuits with that wonderful coffee aroma and taste. In a small saucepan, combine the 100 ml of strong brewed coffee with the 1 tablespoon of instant coffee granules. Gently heat this mixture over low heat, stirring continuously, until the instant coffee granules are completely dissolved. Be careful not to let it boil. Once dissolved, remove the saucepan from the heat and stir in the 1 teaspoon of vanilla extract. This simple syrup will provide the perfect moistening base for our biscuit layers. Set this aside to cool completely. The stronger the coffee, the more pronounced the coffee flavor will be in your final Gâteau Petit Beurre au Café.
Making the Chocolate Cake Batter
Step 2: Creaming the Butter and Sugar
Now, let’s move on to the cake batter. In a large mixing bowl, combine the 150 grams of softened unsalted butter with the 100 grams of granulated sugar. Using an electric mixer or a sturdy whisk, cream these two ingredients together until the mixture becomes light, fluffy, and pnon-alcoholic ale in color. This process incorporates air into the batter, which is crucial for a tender cake. Scrape down the sides of the bowl occasionally to ensure everything is evenly mixed. This step might take a few minutes, so be patient; it’s worth it for the texture of the final cake.
Step 3: Incorporating Eggs and Dry Ingredients
Next, add the 2 large eggs to the creamed butter and sugar mixture, one at a time, beating well after each addition until fully incorporated. In a separate medium bowl, whisk together the 200 grams of all-purpose flour, 50 grams of cocoa powder, 1 teaspoon of baking powder, and 1/2 teaspoon of salt. Sifting these dry ingredients together will help prevent lumps and ensure an even distribution of leavening. Gradually add the dry ingredients to the wet ingredients, alternating with the 200 ml of milk, begin extractning and ending with the dry ingredients. Mix on low speed until just combined; be careful not to overmix, as this can lead to a tough cake. Fold in the 100 grams of chopped dark chocolate. The small pieces of chocolate will melt during baking, creating delightful pockets of richness within the cake.
Baking and Assembling the Cake
Step 4: Baking the Chocolate Cake Layers
Preheat your oven to 180 degrees Celsius (350 degrees Fahrenheit). Grease and flour two 20 cm (8-inch) round cake pans, or line them with parchment paper. Divide the chocolate cake batter evenly between the prepared pans. Smooth the tops with a spatula. Bake for approximately 25-30 minutes, or until a wooden skewer inserted into the center of the cakes comes out clean. Once baked, let the cakes cool in their pans for about 10 minutes before inverting them onto a wire rack to cool completely. Ensuring the cakes are fully cooled before assembly is essential to prevent them from crum extractbling.
Step 5: Preparing the Coffee Cream and Assembling the Layers
While the cakes are cooling, prepare the coffee cream. In a chilled bowl, whip the 200 ml of heavy cream with the 50 grams of powdered sugar until stiff peaks form. If you’re using it, gently fold in the 1 tablespoon ofliqueur extract liqueur. This addition will elevate the coffee flavor and add a subtle sophistication. To assemble, place one cooled chocolate cake layer on your serving plate. Using a pastry brush, generously brush the top of this cake layer with the cooled coffee syrup. Arrange a single layer of Petit Beurre biscuits over the syrup-soaked cake, trying to cover as much surface as possible. Spread a generous layer of the coffee cream over the biscuits. Place the second cooled chocolate cake layer on top of the cream. Brush this layer generously with the coffee syrup, then top with another layer of Petit Beurre biscuits. Finish by spreading the remaining coffee cream over the top layer of biscuits. You can decorate the top with a few extra biscuits or some chocolate shavings for a more polished look. Allow the cake to chill in the refrigerator for at least 2-3 hours, or preferably overnight, before slicing and serving. This resting period allows the flavors to meld beautifully and the biscuits to soften to the perfect texture.
Conclusion:
There you have it – the delightful Gâteau Petit Beurre au Café : Une douceur rétro irrésistible! This layered cake, with its nostalgic charm and coffee-infused elegance, is more than just a dessert; it’s an experience. We’ve journeyed through simple steps to create a treat that’s both impressive and surprisingly achievable. The combination of crunchy Petit Beurre biscuits and the creamy, coffee-scented filling is a testament to how simple ingredients can create magic. Remember, baking is all about sharing joy, and this cake is perfect for any occasion, from a quiet afternoon tea to a lively family gathering.
I encourage you to try this recipe and make it your own. Feel free to adjust the coffee strength to your preference, or perhaps add a sprinkle of cocoa powder on top for an extra touch of decadence. Serve chilled slices of your Gâteau Petit Beurre au Café : Une douceur rétro irrésistible alongside a steaming cup of coffee or a glass of chilled milk. It’s also wonderful with a dollop of whipped cream or a scattering of toasted nuts for added texture. Don’t be afraid to experiment; the best recipes often evolve with a personal touch!
FAQs:
Can I make this Gâteau Petit Beurre au Café : Une douceur rétro irrésistible ahead of time?
Absolutely! In fact, this cake is best made at least a few hours, or even a day, in advance. This allows the biscuits to soften sufficiently and the flavors to meld beautifully. Store it covered in the refrigerator.
What if I don’t have Petit Beurre biscuits?
While Petit Beurre biscuits are key to the retro feel, you can substitute them with other plain, rectangular biscuits like digestive biscuits or even shortbread. The texture might vary slightly, but the overall deliciousness will remain.
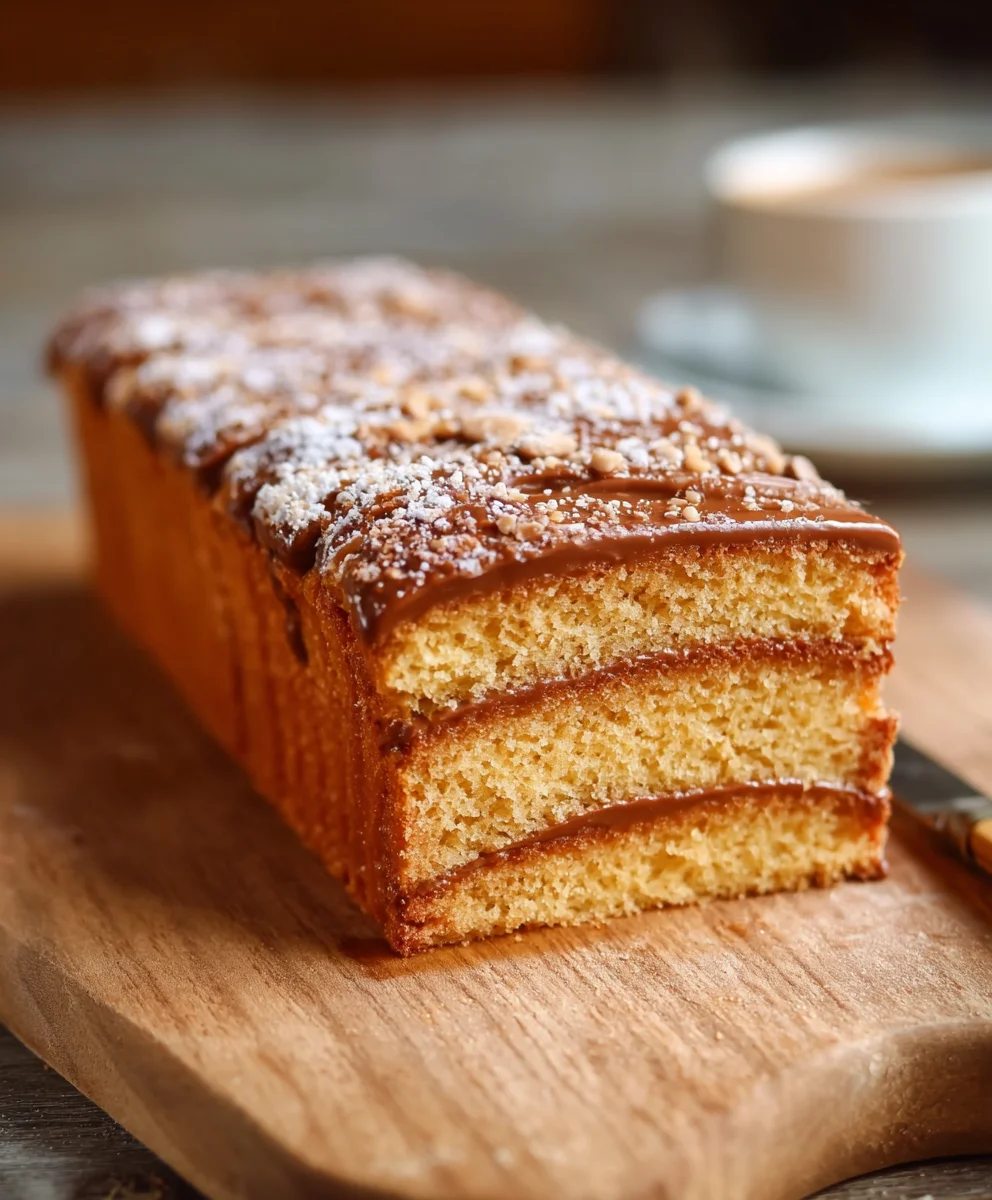
Gâteau Petit Beurre Café – Retro & Irresistible Dessert
A retro and irresistible layered dessert featuring moist chocolate cake, coffee-infused syrup, and creamy coffee whipped cream, all brought together with crispy Petit Beurre biscuits.
Ingrédients
-
150 grams unsalted butter, softened
-
100 grams granulated sugar
-
2 large eggs
-
200 grams all-purpose flour
-
50 grams cocoa powder
-
1 teaspoon baking powder
-
1/2 teaspoon salt
-
200 ml milk
-
1 teaspoon vanilla extract
-
100 grams dark chocolate, chopped
-
100 ml strong brewed coffee, cooled
-
1 tablespoon instant coffee granules
-
200 ml heavy cream
-
50 grams powdered sugar
-
1 teaspoon non-alcoholic coffee liqueur extract (optional)
-
Petit Beurre biscuits (approximately 30-40 biscuits)
Instructions
-
Step 1
Prepare the coffee syrup: Combine 100 ml strong brewed coffee and 1 tablespoon instant coffee granules in a saucepan. Heat gently until dissolved, stirring constantly. Do not boil. Stir in 1 teaspoon vanilla extract and set aside to cool completely. -
Step 2
Make the chocolate cake batter: Cream 150 grams softened unsalted butter and 100 grams granulated sugar in a large bowl until light and fluffy. -
Step 3
Add 2 large eggs one at a time, beating well after each addition. In a separate bowl, whisk together 200 grams all-purpose flour, 50 grams cocoa powder, 1 teaspoon baking powder, and 1/2 teaspoon salt. Gradually add the dry ingredients to the wet ingredients, alternating with 200 ml milk, starting and ending with dry ingredients. Mix until just combined. Fold in 100 grams chopped dark chocolate. -
Step 4
Bake the cake layers: Preheat oven to 180°C (350°F). Grease and flour two 20 cm (8-inch) round cake pans. Divide batter evenly and bake for 25-30 minutes, or until a skewer comes out clean. Cool in pans for 10 minutes, then invert onto a wire rack to cool completely. -
Step 5
Prepare the coffee cream: Whip 200 ml heavy cream with 50 grams powdered sugar until stiff peaks form. Gently fold in 1 teaspoon non-alcoholic coffee liqueur extract (if using). -
Step 6
Assemble the cake: Place one cooled cake layer on a serving plate. Brush generously with cooled coffee syrup. Arrange a layer of Petit Beurre biscuits over the syrup. Spread a layer of coffee cream. Top with the second cake layer, brush with syrup, add another layer of biscuits, and finish with the remaining coffee cream. Chill for at least 2-3 hours before serving.
Informations Importantes
Valeurs Nutritionnelles (Par Portion)
Il est important de considérer ces informations comme approximatives et de ne pas les utiliser comme conseil de santé définitif.
Informations sur les Allergies
Veuillez vérifier les ingrédients pour les allergènes potentiels et consulter un professionnel de la santé en cas de doute.
Leave a Comment